An Image Map is a way of creating images with clickable areas in HTML. The image below is an example of an Image Map. Hover or click on the text, flower, apple or horsefly to see what I mean:
Traditionally, you’d create an image map with a <map> and an <area> tag. But this approach breaks on mobile browsers because it doesn’t adapt to narrower screens.
This tutorial will show you how to create mobile-friendly image maps using SVG objects, like the one above. If you are on Desktop: go ahead and shrink the window to see how the image above shrinks & the clickable areas remain in their proper places.
(Note: there is a good online tool that creates SVG image maps, but it only creates rectangles and the UI breaks sometimes).
Our goal
Our end goal is be to mark up the image on the left in such a way that it’ll have the 4 clickable areas on the right. We’re aiming to embed this image map on a webpage in a way that works equally well on desktop and mobile.
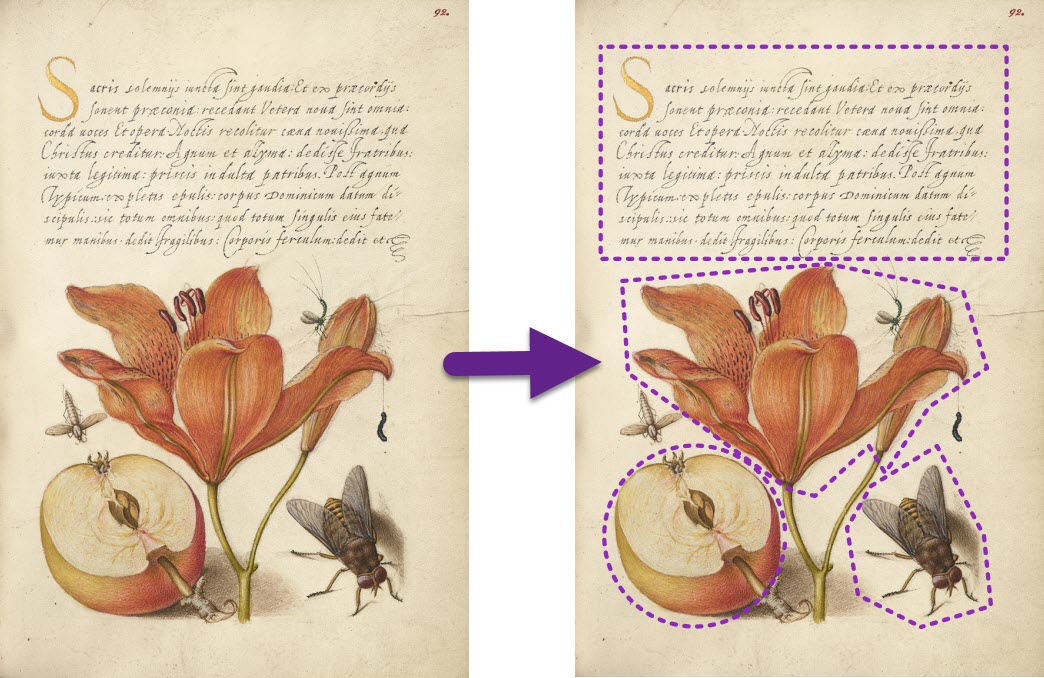
We will accomplish this by creating an SVG object that contains both the image, and the clickable areas.
Step 1: download Inkscape
Inkscape is a free & open-source illustration package (like Adobe Illustrator). We will use it for creating an SVG file for our Image Map. Download the latest Inkscape here and install it.
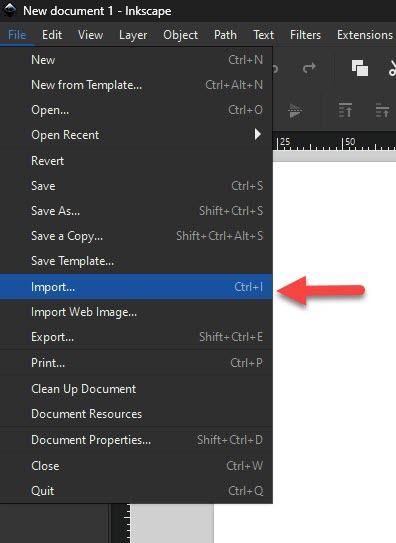
Step 2: import your image
Launch Inscape and embed your “base image” by clicking File -> Import . Choose to Embed the image on the window that pops up.
Step 3: mark up the clickable areas
Use the “Rectangle”, “Ellipse” and “Pen Tool” to mark your intended clickable areas. In the screenshot below, you can see them as 4 green shapes:

Next, we’re going to make these clickable areas invisible. Skip Step 4 if you want to keep an outline around your clickable areas to make them easy to discover.
Step 4: remove the stroke colour
In the “Dialogs” area to the right, choose the Fill and Stroke icon ❶ . Then go to Stroke ❷ and click the X to remove the stroke from your clickable shapes ❸. If you don’t see the “Dialogs” area, click View -> Show/Hide Dialogs.

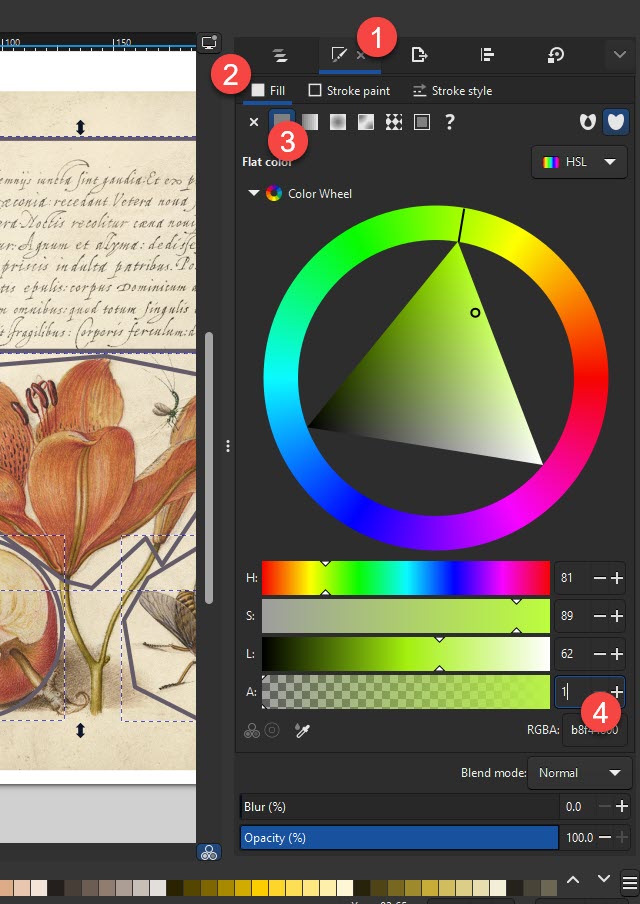
Step 5: remove the background colour
In the Dialogs, go to the Fill and Stroke icon ❶ , then “Fill” ❷ and click the solid colour icon ❸. We’re going to set the transparency (“Alpha”, symbolized by the letter “A”) to 1 ❹. That will make it practically invisible, while keeping some colour there – I found that if we set the background to be fully transparent, then the shape stops being clickable.
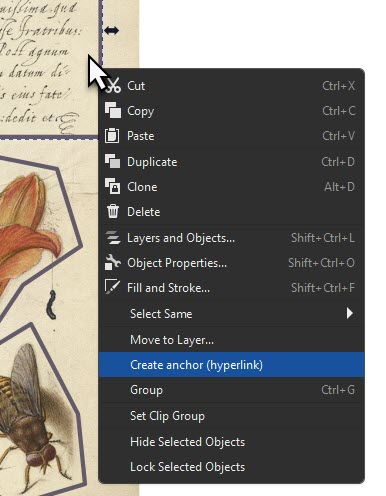
Step 6: turn the shapes into hyperlinks
Here comes the magic: hover over one of your shapes with the mouse. Right click and choose Create anchor (hyperlink). This will turn the shape into a link.
In the Dialogs, click the “down arrow” at the far right of the list of icons. A big dropdown list will appear. Choose Object Attributes.
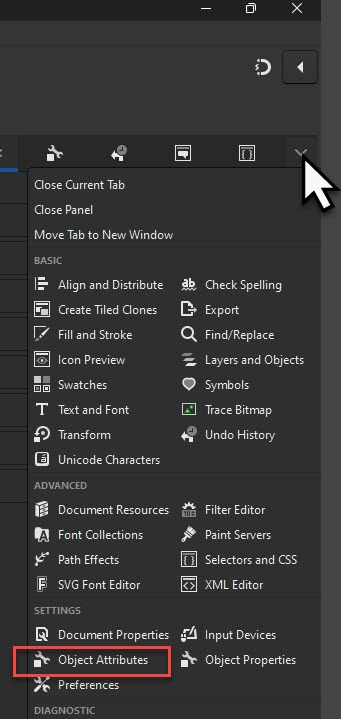
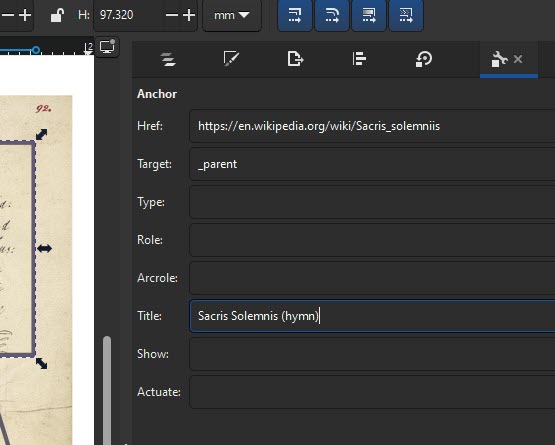
You should see a set of fields like in the screenshot below:
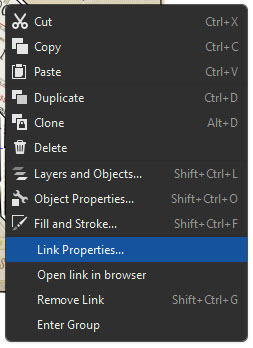
If you don’t see these fields, try right-clicking on your shape and choosing Link Properties :
Fill in these specific details for your clickable area:
| Href | Destination URL (with https:// or a relative address) |
| Target | Always “_parent” |
| Title | Text that should appear on mouse-hover |
Repeat this for every clickable shape, setting it’s own unique destination URL.
Step 7: export as SVG
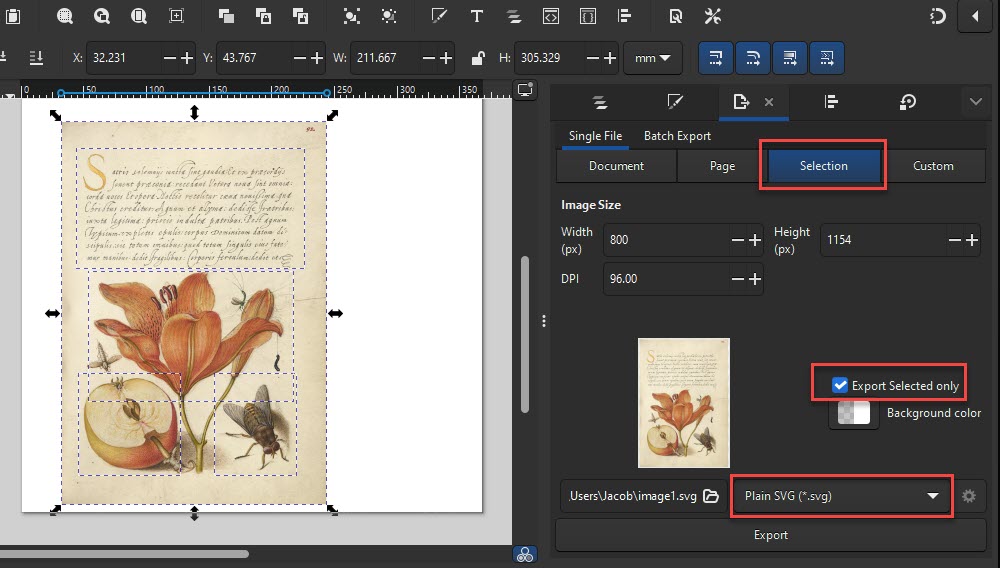
Select the entire image and the shapes covering it.
Go to File -> Export.
Click the “Selection” tab and check “Export Selected only” to export only the selected area (instead of the entire blank white page on the screen).
Then choose your file folder and choose “Plain SVG (*.svg)” from the dropdown next to the filename. Do not choose “Inkscape SVG”.
Step 8: embed the svg file into your webpage
Upload the .SVG file you saved to your server. Then, on the page where you’d like your Image Map to appear, put the following HTML code:
<style>
   #svgimagemap {
     max-width: 100%;
   }
</style>

<object id="svgimagemap" data="path/to-your/svg-file.svg" type="image/svg+xml"></object>
This code says that your imagemap object should have a maximum width of 100% of the parent element. Meaning: the image + clickable images will shrink to properly fit a mobile viewport.
(Optional) Step 9: optimize the svg file
If your SVG file is larger than you’d like, there are a couple of ways to shrink it down:
- Make sure that the “base image” you embedded in the SVG has an efficient format. If your original image was a .PNG, then try converting it to .JPG and then embedding it. If your image as a lot contiguous single-colour areas, then try converting it to .GIF before embedding.
- Inkscape exports an SVG file that’s human-readable. You can shrink it down by removing a lot of readability enhancing components (like extra whitespaces). Upload your SVG file to SVGviewer.dev to optimize it and get a smaller version of the same file.
Email me at jacob at this site to point out mistakes / make suggestions / tell me about the Image Maps you created to give me the warm fuzzies!
Reference notes:
https://web.archive.org/web/20160319050818/http://www.creativebloq.com/netmag/create-responsive-svg-image-maps-51411831
https://stackoverflow.com/a/28277021
